As we mentioned in the previous post on “Must-have products for a perfect masking“, this type of work is crucial for a high-quality topcoat. In that article, we also analyzed the must-have masking products and the specific characteristics that each of them should have, this being the first step to consider in order to achieve a perfect masking. So, in this second post of the series, we will go into detail about the work processes that allow us to achieve a perfect masking. Are you interested in learning about these processes? If so, please read on.
Process for achieving a perfect masking
The masking process is a type of work that requires great precision to avoid interference with the final topcoat of the repair. Therefore, in order to achieve a perfect masking, the following steps must be followed:
- Remove any elements that interfere with the masking, such as lights, badges, fenders, lifting trims, grilles, trims or bodywork components such as bumpers. The removal of these parts helps with the sanding process, but also speeds up the masking process, allows for better paint penetration by reducing the number of joints and gaps between adjoining components, and prevents the appearance of sprays and paint edges.
- Remove any remaining dust and surface dirt by blasting with compressed air.
- Perform a thorough cleaning, both internal and external, of the affected parts and their adjacent components. Clean water, a microfiber cloth and neutral pH soap are used for this task.
- Remove hidden dirt from recesses, joints and cavities in the bodywork using compressed air. After this process, it is common for some of the dirt particles to be deposited on the exterior bodywork panels, so a subsequent blasting of these parts is required to remove the dirt.
- Degrease low adhesion interior rubbers and frames, so that the masking tape sticks properly and does not peel off during paint application or during the drying process.
- Place the vehicle in the booth.
- Place the strip on all gaps between removable body components (between flap and hood, between rear door and front door, etc.).
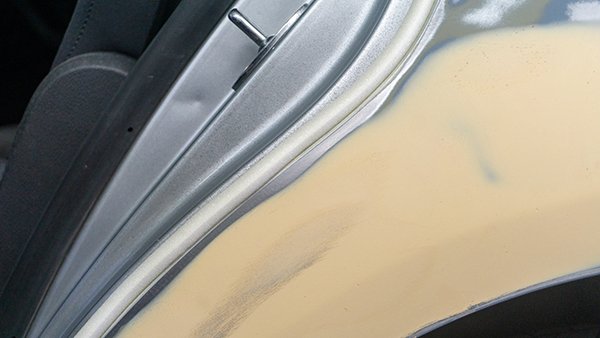
- Contour the perimeter of the parts adjacent to the repair with masking tape of the appropriate type and diameter. If rubber bands are present, replace the masking tape with trim masking tape.
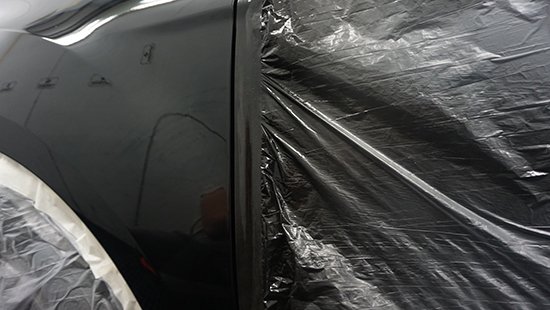
- Select the paper or film format that best suits the dimensions of the area to be masked. For large formats, the necessary piece must be cut, so it is important that the cut is as even as possible.
- Position the edge of the chosen paper or film over the contour made previously. In the case of large formats and when the edge of the paper or film is uneven after cutting, care should be taken to fold it inwards to obtain a straight edge to facilitate the placement of the tape and to optimize the masking sealant.
- Place the masking tape on the edge of the paper or film, if the chosen format does not have integrated tape. When positioning the tape, it must be centered on the contour, free of folds and openings, and be properly stuck to it. This eliminates the risk that the sprayed paint runs into the parts not involved in the repair.
- Apply specific masking to those areas where partial painting or blending is to be carried out. There are two ways to proceed in this regard:
- In the case of partial painting, the panel ribs are used to make the cut, so strip or masking tape is applied over the entire length of this area. In the case of masking tape, it should be applied by sticking only half of its width so that the other half can be flipped over and the paint edge generated is not sharp.
- In the case of blending, a sufficient margin of the part is left unmasked and the cut area is never closed with tape. The purpose of both measures is to avoid the appearance of very pronounced paint edges that would hinder the subsequent integration polishing process.
- Mask the small elements that may be present, using the cutter when necessary to obtain a perfect contour.
- Mask the wheels, taking into consideration that, if the mudguards have not been removed, the masking paper must be inserted between the mudguard itself and the flap contour to ensure that the former is not sprayed.
- In the case of rim painting, the wheel is dismounted and deflated, and the tire is then debeaded to facilitate the masking.
Process for achieving a perfect unmasking
At first glance, the unmasking process is not very complicated, as it is often carried out when the paint is not completely dry. For this reason, in order not to compromise the repair carried out up to that point, the unmasking should be carried out as follows:
- Remove the strip or tape that has been used on the cut areas of the partial painting or blending as soon as the application is complete, without waiting for the paint to dry, as this will make the gradient or the edge that is formed less pronounced.
- Make sure that the paint is dry before unmasking, so that it acquires its final mechanical properties and the risk of peeling is eliminated. If for any reason the car has to be removed from the spray booth before the paint has properly dried, an opening is made in the masking on the glass for visibility and to remove the vehicle.
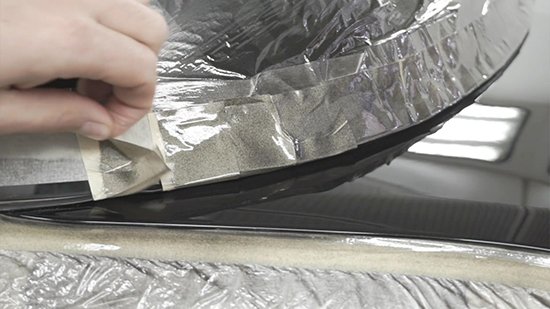
- Once the paint is sufficiently dry, the unmasking process begins by removing with extreme care the tape that keeps the paper or film in place around the perimeter of the repaired area, pulling it towards the opposite side of the painted part. This breaks the paint film that binds the tape to the rest of the part and eliminates the risk of peeling. The process is repeated with the sections of contouring tape placed underneath the masking.
- Then, all the paper or film protecting the rest of the vehicle is removed.
- The strip is then removed, making sure not to pull it, but by opening the component where it is located and carefully pulling it out.
- Finally, the wheels and any small parts that had to be covered are unmasked.
Second step for achieving a perfect masking: follow a meticulous and orderly work process.
After choosing the masking products that best suit the performance and characteristics of the repair, the only thing left to do is to carry out a thorough and orderly work process, both when masking and unmasking the vehicle, always following the instructions given in this guide. Performing these two steps makes the masking process more efficient in order to increase productivity, without reducing the quality of the final work.
That concludes the two articles on masking that we have prepared for you. We hope you liked them. Follow our blog to read about topics of interest related to vehicle refinishing!